Thank you for supporting Rewind!
Rewind is the first plugin of MonkeyC and can be used to save all the missed inspiration out there. It always has the audio and/or MIDI of the last 60 minutes in its memory ready for you to use in your projects. We have worked for over a year perfecting this concept. Please use this application or plugin in as many ways as you see fit! (and let us know about them! 😃 With your help we can make this into the best idea-saving app in the music industry.
thanks, Monkey©
We created Rewind because we encountered a lot of situations where we missed recording something unique. Either the DAW was not recording or we did not even start it up. When you are not a great piano player, like we are, we would sometimes play a golden riff, only to find out that we did not record it. To later reproduce the part always felt different: either the timing was off, notes were different or we had tweaked the sound in the meantime.
NO MORE!
Rewind is a continuous little tape recorder that will keep up the last 90 minutes of audio and MIDI that it monitors. Should you play or sing something cool and fail to record it, then Rewind will have it saved for you. Think of it as a going back-into-time device! You can then simply drag the audio or midi into your composition, you will never lose another spontaneous moment again. Rewind can run in standalone or as a plugin in your DAW. Check the use-cases section to see how you can setup Rewind to automatically start recording when you boot up your computer.
Version 2.2.2
- Add keyboard shortcuts
- Add your own markers
- Add play region button
- Auto resume now also detects mouse movements
- Show scrollbar during recording
- Avoid cache being cleared on changing the audio input device
- Add dialogs to warn the user when the cache is about to be cleared
- Improve a few colours and fonts
- Fix empty beginning selection
Version 2.2.1
- Add option to disable audio capture
- Improve RAM usage when exporting
- Add midi output channel dropdown
- Improve audio configuration warning label
- Improve look and feel for buttons and settings
- Re-enable DAW midi input
- MIDI CC information with colors
- Play only the currently shown midi or audio
- Fix issue of muted audio in MIDI FX plug-in
Version 2.2.0
- Zoom functionality
- MIDI playback
- Windows Shared MIDI extension
- Smart Drag
- MIDI FX
- Auto Resume
- Clear cache button
- Save file to folder button
- Added rec label
- Set export depth
Version 2.1
- Capture system audio on Windows
- Show midi CC messages in MIDI/waveform window
- Set bit depth for export
- Midi list indicators
- Add Rec indicator
- Add timeline and add export snapping
- Restructure setting tabs
- Set custom export location
Not all DAWs and Operating Systems work the same with MIDI and MIDI files. We have seen some cases where recorded MPE or CC information was recorded correctly by Rewind but then was lost when dragging the recorded part into the DAW.
At this moment Ableton loses part of the MPE information (we have reported this to Ableton). Also, Bitwig truncates MIDI CC information when a Rewind capture is being dragged onto a track. If you find that other DAWs do not behave the way they should, please let us know, and we will contact the manufacturer and report it.
At this moment Ableton loses part of the MPE information (we have reported this to Ableton). Also, Bitwig truncates MIDI CC information when a Rewind capture is being dragged onto a track. If you find that other DAWs do not behave the way they should, please let us know, and we will contact the manufacturer and report it.
One special note for Windows users:
When working on Mac, it is no problem to share a MIDI connection with other applications. Two applications can easily monitor the same device. With Windows, this does not work the same way. Luckily we have found a solution for that: the Rewind SharedMIDI extension. To read more about its working and installation, please go to the SharedMIDIsection!
Rewind can work on Mac and Windows, currently we support AU, VST3, AAX and standalone. In your download you can see a .dmg file for Mac and a .zip file for Windows. Installation should be straightforward, but do let us know if you run into trouble.
When you open the plugin for the first time, this screen will popup.
Click 'Activate' then you will see this:
This is where you fill in the serial number you received from us in your order. You then move on to this:
Now you will need to fill in your iLok account' details and click 'Next'.
Click the Rewind license and then click 'Next'.
Now you select the location where you want the license to work. Select your computer or your cloud.
Selecting 'cloud' will ensure you can use Rewind on 2 computers by starting an iLok cloud session. This way the Rewind license is temporarily transferred from one computer to the other.
And you are done! Enjoy Rewind!
Rewind will ask you permission to use your microphone, please give it permission!
To use Rewind as standalone:
- Locate the Rewind in your program/application folder.
- Open Rewind
- Click the Settings icon (the gear icon in the top right corner)
- Click on the Audio Settings tab
- Select the Input and Output Devices (black dropdowns)
- Select the Input and Output Channels (blue buttons)*
- You can change the Sample Rate and Audio Buffer Size if needed
- Close the popup window
- You are ready to go!
* You can choose multiple inputs to capture which will be merged to one track.
- Drag the Rewind plugin onto the track of your choice
- You are ready to go!
- If you are monitoring a microphone, please be careful of feedback. If you experiencing feedback, please mute the audio output on either Rewind or the track itself!
Rewind works like a conveyor belt. Any second of audio and MIDI that it receives will stay on there for the chosen interval (cache length in preferences), which can be as long as 30 minutes.
Step 1: Select your audio or MIDI
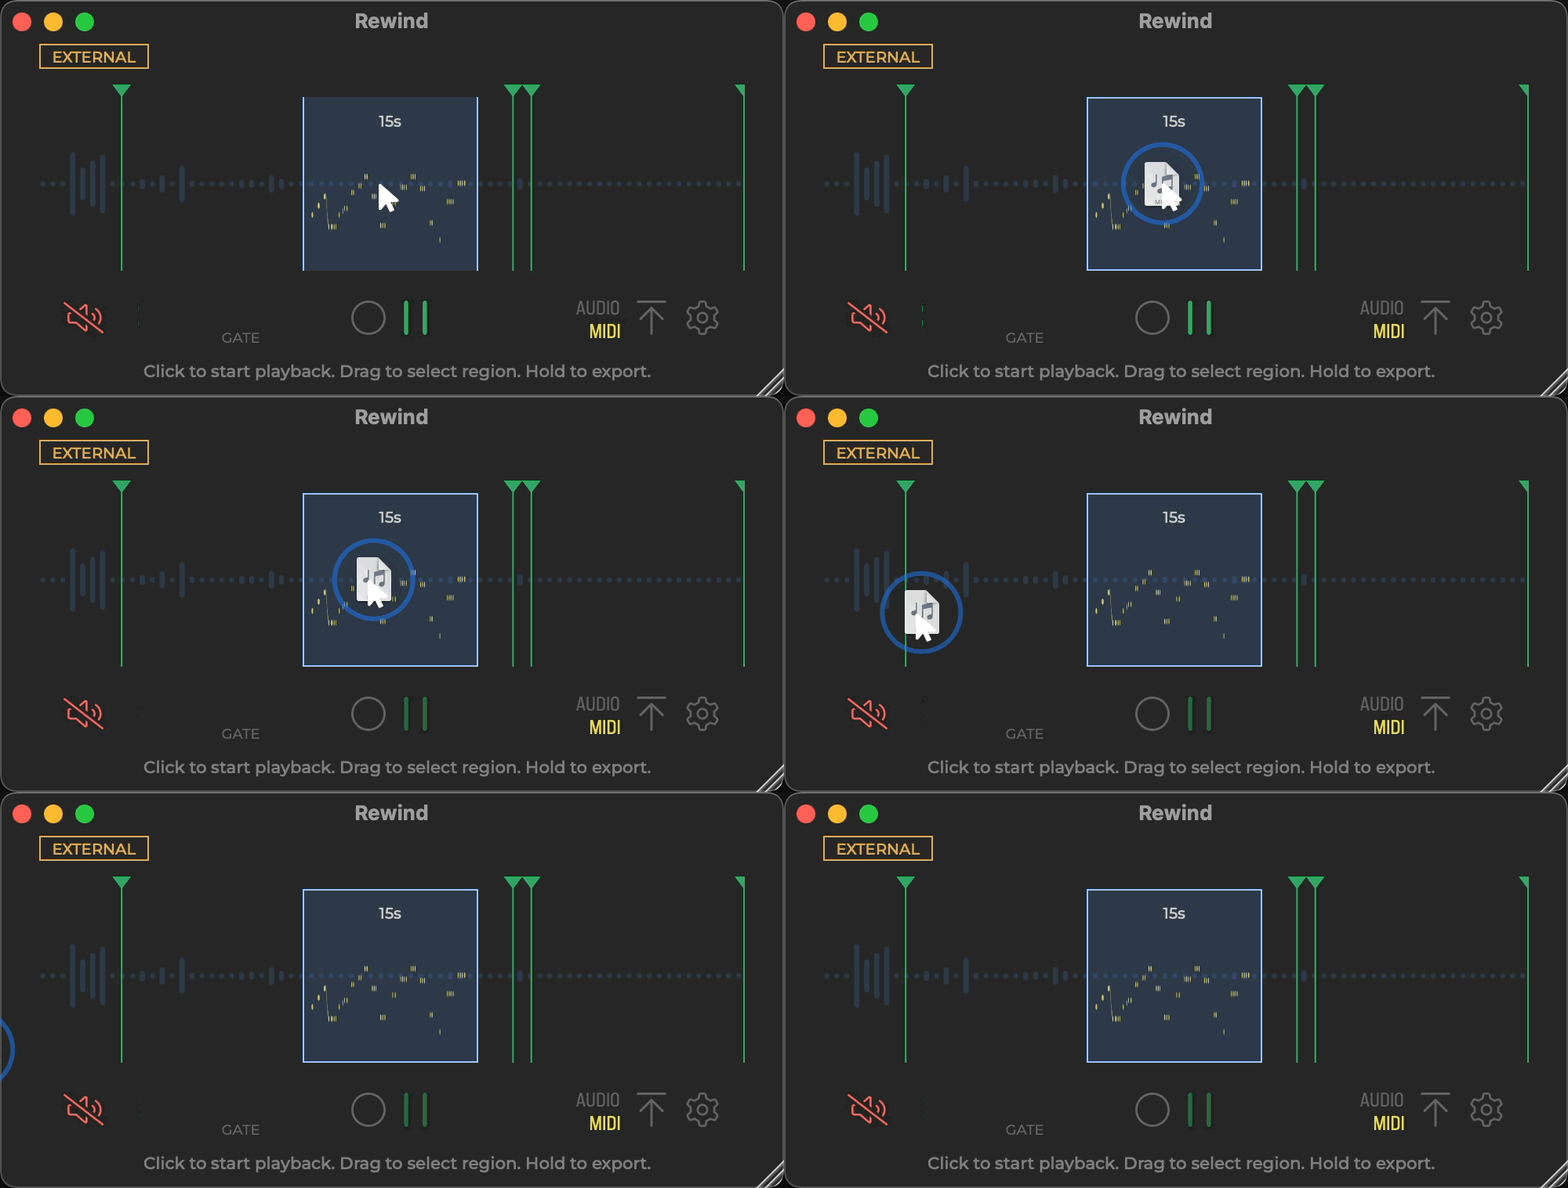
Step 2: Click and hold (1 second), then drag into your DAW or to your hard drive
We have added the following special features for Rewind as a plugin:
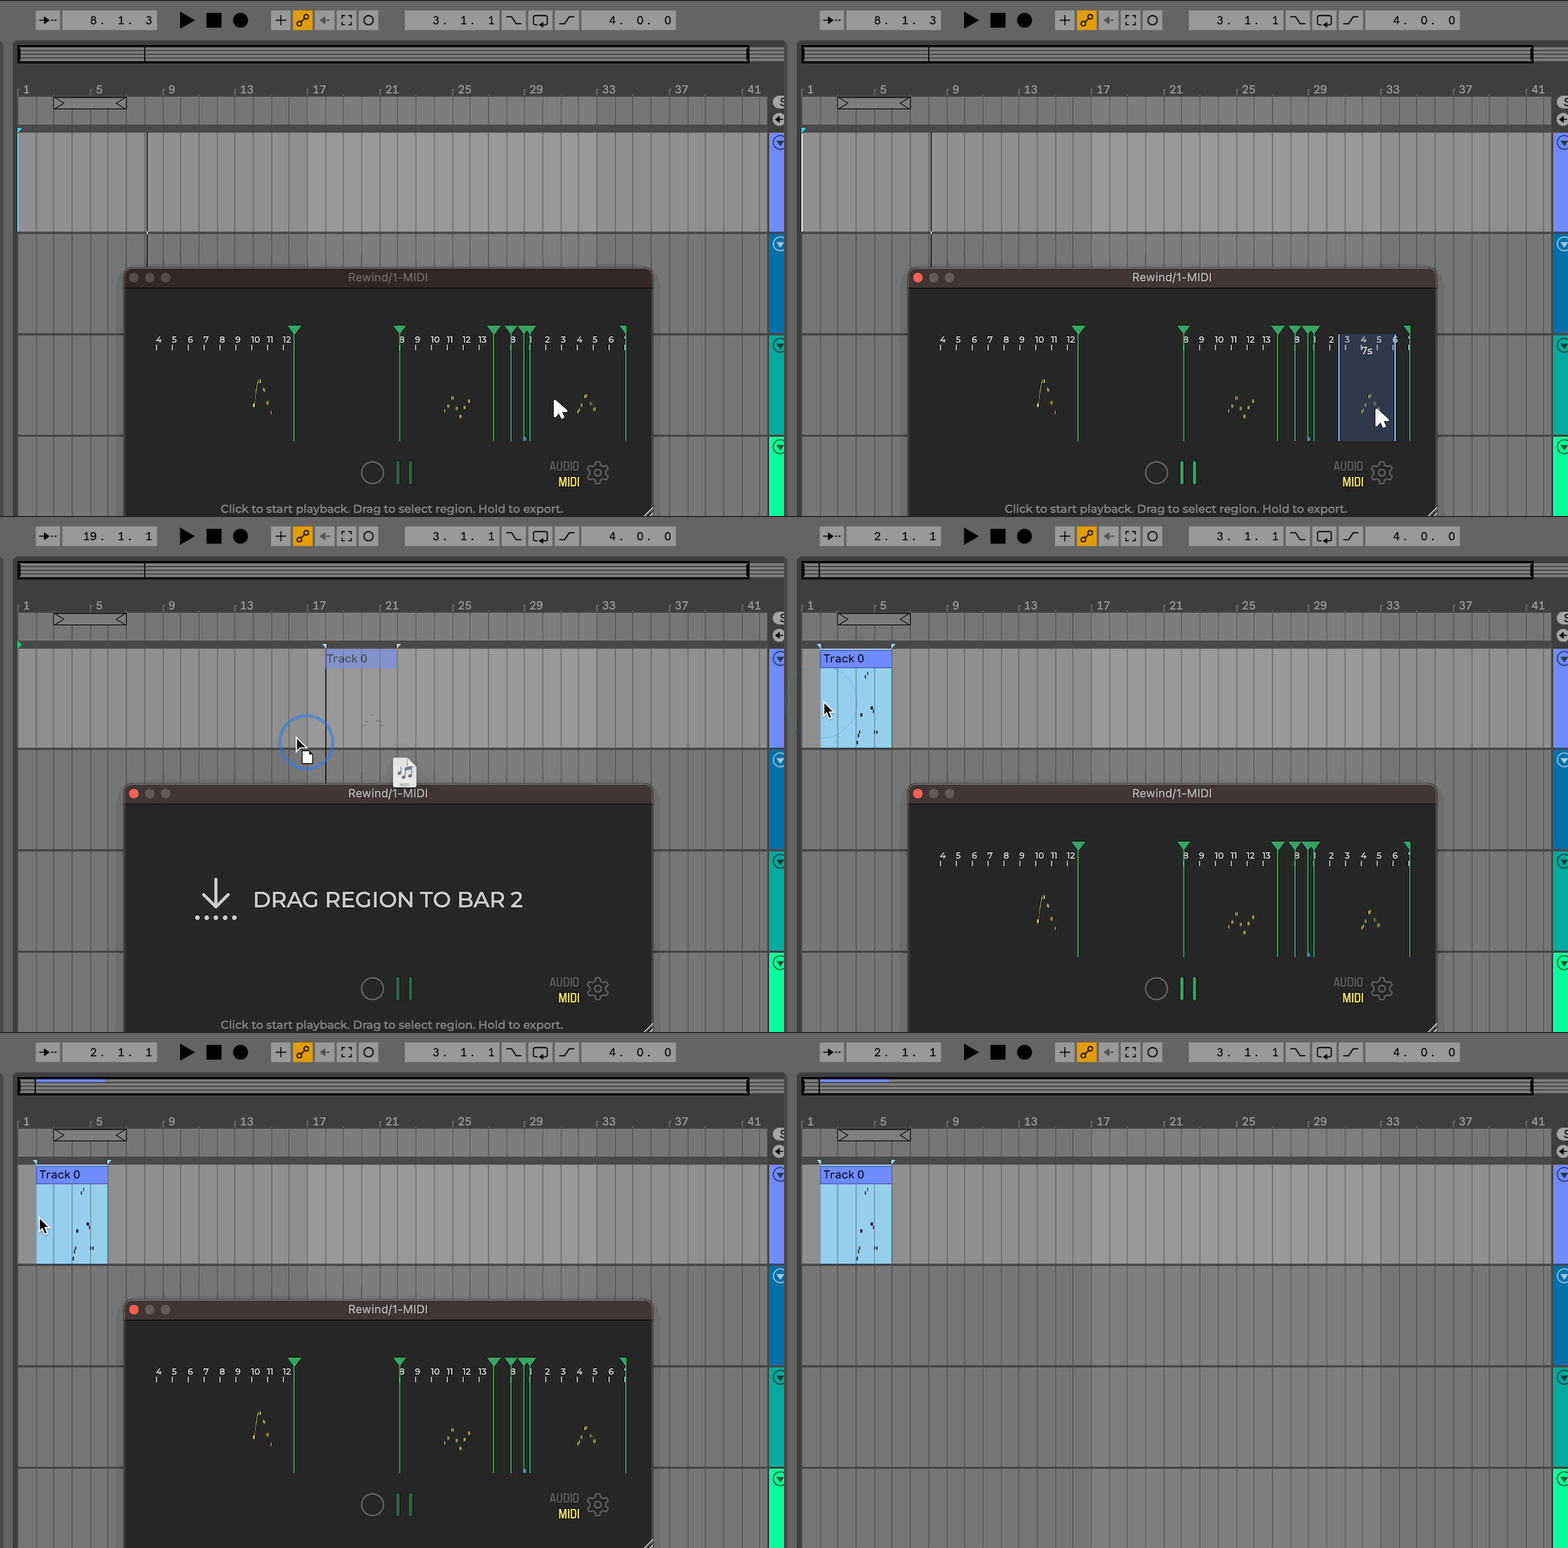
When you run Rewind as a plugin and your DAW is running, tempo information is now visible in the regions:
To make your life easier with placing dragged audio, when tempo information is available, you will now get extra instructions from Rewind where to drag the file exactly so it will align perfectly to the time and place in your arrangement where you played what was captured!
We have also made MIDI FX versions of our plugins. Not every DAW (i.e. Ableton) knows how to deal with them properly, but DAW's like Bitwig or Logic Pro do.
The MIDI FX version is a stripped down version of the normal Rewind plugin and will only record MIDI. Advantage of using this plugin is that you can put it before your VST instrument as opposed to the normal version which needs to be inserted after.
If you run Rewind as standalone, you will always have Rewind recording whatever audio and MIDI it monitors. This is really helpful for musicians that have analog synthesizers, instruments or vocalists that do not need a DAW to jam.
If you use Rewind on a DAW channel as plug-in, you can record and audio channel coming in before you apply effects. Rewind is also very handy if you have effects and synth plugins that have a lot of randomness to them. This way you can finally save the audio that you heard while playing your track vs what comes out when you export your track.
If you put Rewind on your output (preferably before your mastering effects), you can try out different muting techniques in arrange or always record what you played on a synth or sang into the microphone when you did not press record. A catchall method for your genius creativity! You should consider saving a template for your DAW where you can have Rewind be a part of any new project you create. It will be there always!
(!) Please note that you can use multiple instances of Rewind in your DAW. 😃
Record internal applications or what you hear on the web
By clicking the external/system button in the top left corner it is easy to switch from capturing outside sources to internal. In order to do so Rewind installs an extra piece of software on your computer that reroutes the system audio through Rewind. Once you quit Rewind or switch back to external mode, the original audio routings are restored.
If you have switched to System mode and do not receive audio from your application, it might be that your application has the option to select the audio output device (for instance if you record a standalone audio app). In that case you should select Rewind in the audio output section of your application.
1. External/System button (standalone only)
This button toggles between recording the external and system sound sources. This will erase what is currently in memory.
Mac:
When you switch between System and external audio input (on Mac) the system audio output device you have selected in the OSX preferences menu will temporary be set to Rewind. Once you switch back to External mode or close Rewind your original audio routing will be restored.
Windows:
When you switch to System and extra popup will appear next to System where you can select the application that you want to monitor. As opposed to Mac where all system audio is monitored at once, with Windows you need to select which application you would like to monitor. We have added some smart filtering to the huge list of processes that go in in Windows to make the list smaller. Should the application that you want to record not appear in the dropdown, send us an email and we will try to include that as well!
2. The waveform/MIDI notes area
This is the area where you can see, select and drag the audio and/or MIDI that has been captured in Rewind. We have added an option in the general settings menu to increase the resolution of the audio waveform.
Since 2.1.0 we also show CC information here.
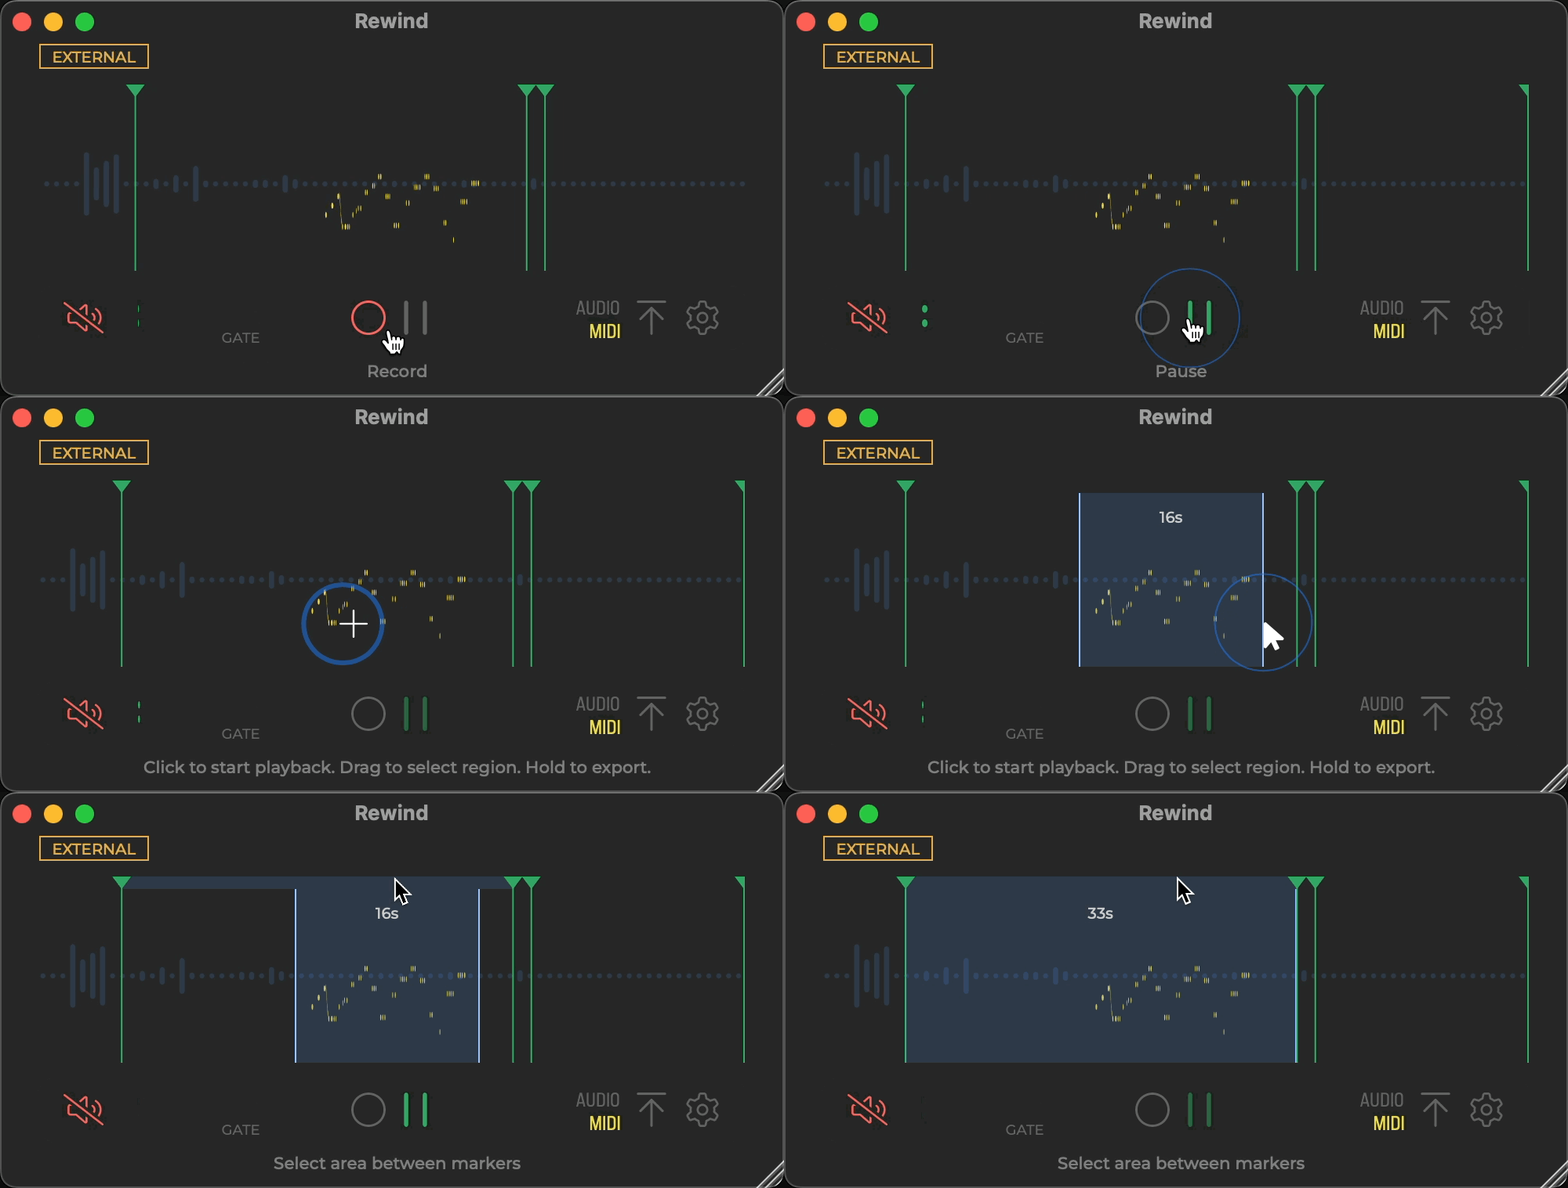
Whenever the capture has been paused (either by pressing Pause or the gate recording hold time has been reached), a green line will appear to indicate that pause. By clicking the green triangle playback will commence from the marker.
4. Audio input mute button
There are situations where you do not want the audio input to be heard whilst you are recording. Best example we can think of is when you are recording with microphone. If you are not careful, you run the risk of audio feedback that will hurt your ears and speakers. On a side note: audio input will also be muted if you are in pause mode.
Here you can see the levels of the audio signal coming in.
By clicking the Gate button you can activate gate recording mode. Gate recording is a form of recording where Rewind will only start recording once the audio input level exceeds the gate level or when incoming MIDI is received. Then, if the audio level stays below the gate level, Rewind will record for the gate hold length time, that you can set in the general settings. Every time the audio exceeds the gate level the counter is reset for the hold time.
This will give you a very efficient capturing experience!
Clicking here switches between record and pause modes
This toggles between audio and MIDI modes. Every time Rewind receives MIDI a yellow dot next to the word MIDI will appear.
When the arrow is blue, Rewind is in window float mode, which allows Rewind to be always visible when you switch between applications. Double-click the icon to also make Rewind snap to the top right corner of our screen.
👇🏼 Continue reading in the Settings chapter below.
When recording in a DAW environment there usually is no noise floor when you are recording VSTs for instance. To show that Rewind is recording, we have added this indicator.
This shows you what area has been selected. Simply click outside this area to deselect.
When you click between the marker triangles you can select the area between the markers.
3. Auto resume indicator (standalone only)
If enabled, Rewind will resume recording if there has been no mouse activity for a period of time.
Everything in the blue outlined box is what you see in the big waveform display. You can move the sides with your mouse or with trackpad gestures to zoom in and out. Double-clicking will zoom out to the whole recording.
Click this and the whole memory will be reset.
By clicking here you can save your selection to your hard drive. Alternatively, you can drag your selection out of Rewind onto your favourite application or desktop.
Clicking here switches between record and pause modes
Warn about losing recording
This setting will show a warning dialog if you are about to lose what you have recorded, like by closing the standalone version or changing samplerate etc.
Resume recording after inactivity/on close
In standalone: you can choose after how long a period of mouse inactivity Rewind needs to start recording again. This feature is handy if you are working in another window or started playing again and forgot to put Rewind in record mode again.
In plugin: when you close the plugin window, Rewind will start recording again.
This is where you can set the resolution of the waveform. You can switch between 1x, 2x and 3x.
When gate recording has been enabled, this is the time Rewind will record if the actual audio level stays below the gate recording level. Every time the audio exceeds the gate level the counter is reset.
This is where you can set the duration of what Rewind will record for you. You can choose 1, 2, 5, 10, 15, 30, 60 and 90 minute lengths. Beware (!) that when you change this setting, the current recorded audio will be cleared.
Rewind will maximize the loudness of the audio when you export.
You can now choose with which bit depth you can export your file.
Smart drag helps you place the dragged file more easily in your DAW. If Rewind is running and you start playback or record in your DAW, Rewind also records the bar information. When Rewind has recorded something with DAW bar information you see a mini timeline in the recorded region. As soon as you drag the file out of Rewind, Rewind will tell you to what bar to drag your recording and your recording will line up exactly to where you originally played your recording.
There are three options you can choose from:
Off - Rewind does add extra space to the file so a dragged file will line up
On - Rewind will add a bit of empty audio to the left of your recording so can line up exactly with a bar in your arrangement.
Force Loop - Rewind will also add empty audio after your selection so tempo guessing DAWs like Ableton and Reaper will not misguess the tempo!
This takes you to the location on your harddrive where the audio and MIDI will be saved. If you save a lot of audio, please keep in mind that audio files are quite large. 10 MB per 1 minute of stereo audio (44khz) so this could folder can grow very fast. In a new version we will come up with a fix that will move any dragged audio to the right project folder.
Here you can set where Rewind saves your exported files. External disks are also supported!
Here you can choose to disable audio capture completely. Should you be working on a computer with limited amounts of memory, this will allow you to record for a very long time, with almost no memory increase at all.
Input (only for standalone)
This is where you select the audio device for incoming audio. With the new v2 of Rewind you can select all the inputs of your audio or aggregate interface (we have tested with up to 64 inputs ;) to monitor even more inputs. These are not exportable separately but are mixed into one track. If you want your input to be mono, you need to select it in the mono dropdown. If this input was previously selected in the stereo input list that pair will be deselected in the stereo list. This also works the other way around.
Output (only for standalone)
This is where you set the audio output for monitoring.
This is where you set the sample rate of the audio, the higher the bigger the audio files will be!
This is where you set the audio buffer size. Very low values will cause clicks and pops in the audio.
This allows you to deactivate the MIDI recording all together. For Windows users this is especially handy to free up the MIDI devices (as mentioned in our MIDI note in the beginning of the manual).
Shared MIDI Enabled (Windows only)
Windows does not allow applications to share MIDI devices. If you were to start Rewind first, select your device and then start your DAW, that MIDI device would be unavailable. To counteract this, Rewind has an extension called SharedMIDI. SharedMIDI creates a clone of every device and appends the word 'Monkey©-'. In Rewind you select your normal device and in your DAW you select the 'Monkey©-' version and you are good to go!
In this video we elaborate a bit further on how it works and how to install it:
Here you can select which device(s) you want to monitor. In the plugin you will also see an extra device called the DAW INPUT.
To prevent MIDI feedback or double notes in your DAW we have made it so that the DAW MIDI INPUT option disables the normal MIDI ports and vice versa. To select an external MIDI port, please disable the DAW MIDI INPUT option first, then choose whatever devices work for you.
We have now added indicators to show you which device(s) is send MIDI.
Here you can set your external MIDI output device so you can hear what just have played.
Here you can set the channel which you want to play back to. 'All' will not change the channel information so it is exactly how Rewind received it. You can choose a dedicated channel from 1 to 16 if your MIDI device receives on another channel then what was recorded.
We now have shortcuts built-in in the standalone version. This will greatly improve useablity!
This will enable the shortcuts
- Record: Toggles the main record and pause modes
- Add Marker: During record you can add a marker
- Zoom: This will zoom the selection in or out
- Select Region: This will select a region between the green markers
- Play: Toggles the playback of the audio/MIDI in pause mode
- Export: Opens the file export dialog
- Move: Moves the zoom area to the left or right
- Gate: Toggle gate mode on or off
Here are some use cases that we came up with!
If you have ever recorded a singer, you know that they always get a bit more nervous when the tape was rolling (or the DAW was recording). Usually when rehearsing the most beautiful adlibs could be heard, but usually were never recorded. Rewind sits in the background and makes sure you capture every nuance to make that hit record.
When mixing it is great to use reference tracks to compare your mix against those of your favorite artists.
Ever wanted an easy and fast way to sample what you hear on Youtube? Not an issue with Rewind. Simply play the part you like and drag the audio from Rewind into your sampler.
Sometimes you just want to sit down quick and record/play what is in your head. A lot of people (us included) don't always take the time to turn on their DAW... So you have to do a lot of left brain activities, like starting up your DAW, selecting the right input channel, etc. Results: missed moments and close, but less original replays of what you had in your head. Rewind has got you covered, stay in the flow!
We are not great piano players, so when we finally play something cool, it is hard for us to repeat it exactly. Even when the DAW is already on, we forget to press record or when we do, the replaying of the idea usually has lost its magic. Rewind has the Audio AND MIDI so you can be sure to keep on rocking!
Recording Analogue Equipment
Analogue equipment like vintage synths, modular or FX sound great, but since they are analogue they will always sound a little different. Capture that crazy quirkiness with Rewind and always have the sound you fell in love with!
Not every DAW has a straightforward process of bouncing a quick part of the audio. Use Rewind as a plugin in your DAW and work super efficient.
Now it is super easy to practise arrangement ideas by simply muting, soloing and using faders. You now have a recording of what you did and recreating your movements was never easier!
There are probably a million other ways to use Rewind. Share your experiences with us and we will include it here!
Read this part if you want to make sure that Rewind is always active when you boot up your computer.
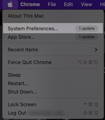
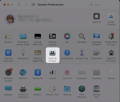
Click on 'Users & Groups'
Now click on the + icon to and add Rewind (located in your Applications folder)
You should see Rewind now in the list.
Optionally you can click 'Hide' to have Rewind hidden from view.
That's it, you are done! Next time you start up your computer, Rewind will be active!
We still have to make this part for Windows, but this will get you started:
Just like above, you can also have Rewind included in every new song you make in your DAW. We have collected some links to get you started, and soon we will have detailed steps on how to do this for each DAW.
Note: if your DAW is not listed here, please let us know, and we will include this for you.
If you have any questions, feedback or need support, please contact us
here.


